Published:
Last updated:
How do we keep this site running? This post may contain affiliate links, for which we may receive a referral fee. The cost is the same to you and any compensation we may receive does not affect our reviews or rankings. Thanks!
I attempted to import my massive data file from Quicken Home & Business into Moneyspire and it worked flawlessly.
I imported 38 accounts with thousands of transactions from 2004 to 2017. All my accounts showed up in Moneyspire, along with all the transactions, categories, and balances for everything. The process was very easy.
Here’s how to do it. You can either watch the video or read the steps below.
How to transfer a Quicken data file to Moneyspire
1. Open your Quicken data file in Quicken
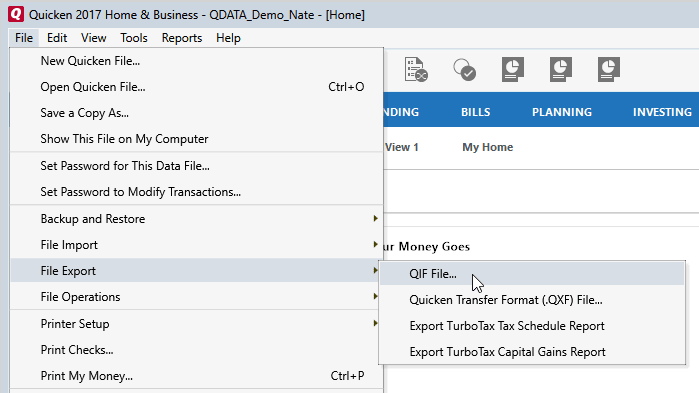
2. Go to File -> File Export -> QIF File
3. Choose a location for the exported file and the date range you want to export.

4. After exporting your Quicken data to a QIF file, open Moneyspire.
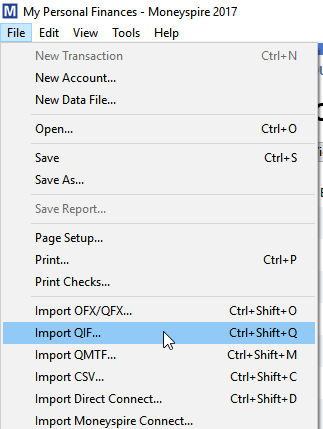
5. In Moneyspire, go to File -> Import QIF.
6. Browse to the QIF file you exported from Quicken. Select the bullet for “This file is from another financial software application”
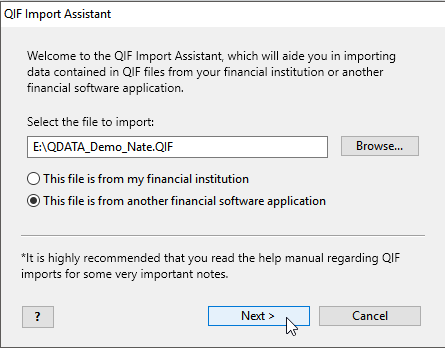
7. Click next, then wait until the import finishes.
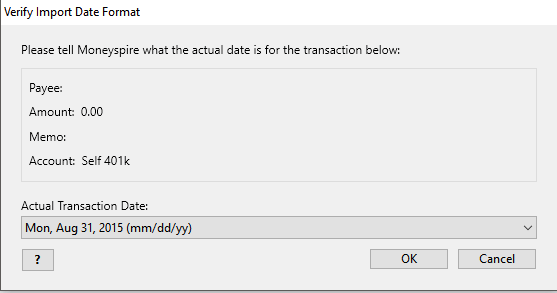
Note 1: During the import, you may get asked to verify the date for one of the accounts in your QIF file. This is because Moneyspire is making sure it has the correct date format. You’ll only be asked this question once, so make sure to choose the correct date.
Note 2: Windows may say that Moneyspire is not responding and ask if you want to close the program or wait. Choose “wait”. Moneyspire will take a few minutes to import all your data, depending on how many transactions you are transfering from Quicken.
Note 3: After importing all my accounts from Quicken, I had to go through them in Moneyspire and mark the ones that have been closed. That prevented them from showing up on the main accounts list.
After I imported all my data from Quicken, Moneyspire continued to work without problems. It was fast and responsive. All the reports worked flawlessly.
I highly recommend giving Moneyspire a try if you’re looking for a personal financial management tool. It works on both Windows and Mac and is completely free to try for 30 days. Download it here.
If you want more information about Moneyspire, check out my full review.

Nate Phillips has been using Quicken and TurboTax for over 20 years. He has spent part of that time as a Quicken beta tester, helping identify bugs and annoyances with Quicken updates before they are released. Nate holds a master’s degree in Computer Science and has numerous technology certifications.
